Author name: suthardineesh0

Close-up of Scrabble tiles spelling 'Consent' on a wooden surface, focusing on ethics and communication.

Understanding Wood Grain and Why It Matters

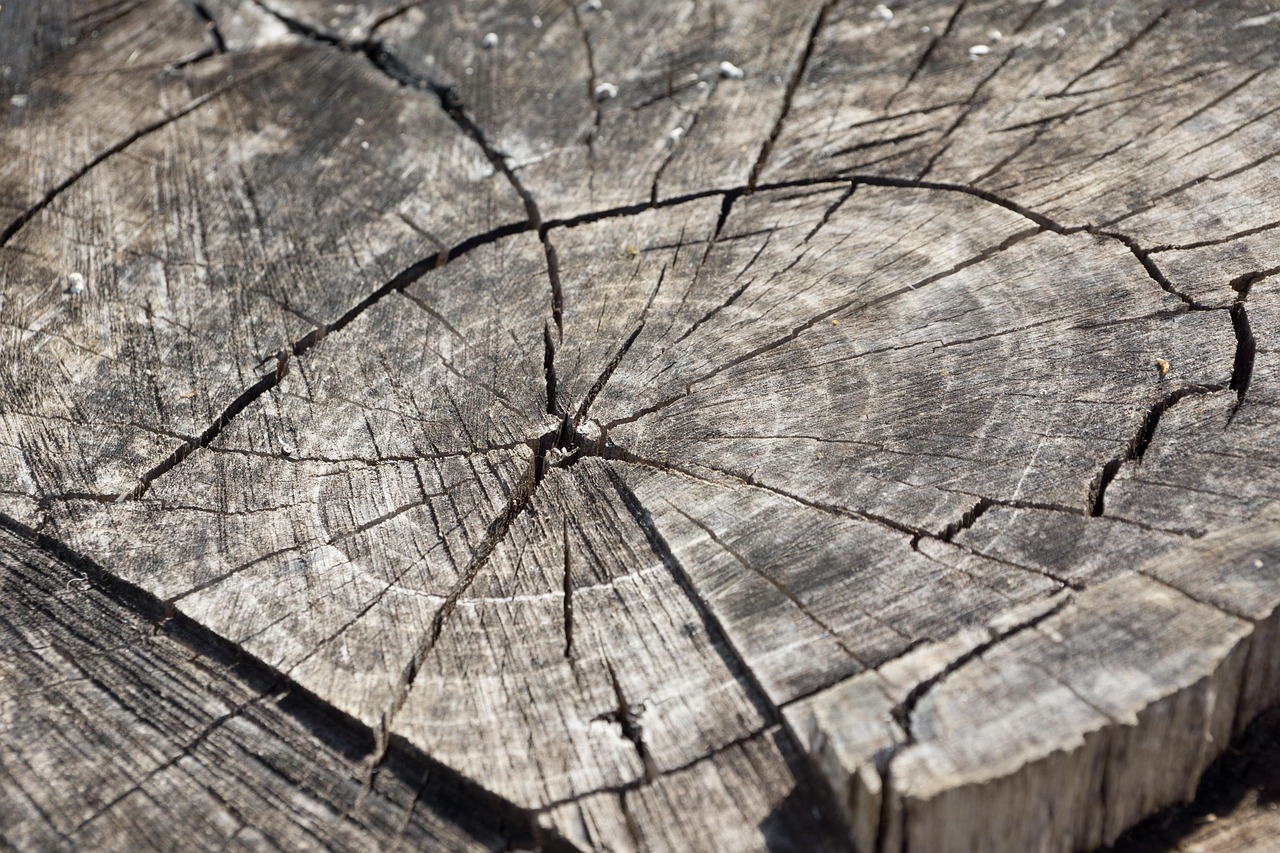
Wood grain isn’t just about looks—it’s a guide to strength, stability, and workability. 1. What Is Wood Grain? Wood grain refers to the alignment, texture, and pattern of fibers in a piece of wood. These fibers form as a tree grows, influenced by species, growth conditions, and how the wood is cut. The grain affects not only how wood looks but also how it behaves when cut, joined, or finished. 2. Types of Wood Grain Patterns The pattern of the grain depends on how the lumber is sawn. Common types include: Flat-sawn (Plain-sawn): The most common cut, producing a wavy grain pattern. Economical and widely used. Quarter-sawn: Produces straight, uniform grain lines. More stable and less prone to warping. Rift-sawn: Creates a linear grain with minimal flecking. Often used in fine furniture. 3. Grain Direction and Workability Understanding grain direction is key when working with wood. Cutting or planing against the grain can cause tear-out and rough surfaces. Always try to work “with the grain”—the direction in which fibers naturally run—to get cleaner results and avoid splintering. 4. Grain and Wood Strength Grain also impacts strength. Wood is generally stronger along the grain than across it. For structural uses or weight-bearing pieces like shelves or legs, consider grain direction to maximize durability and reduce the chance of breakage or warping. 5. Aesthetic Appeal Grain patterns give wood its unique character. Some woods, like oak and walnut, have bold, dramatic grains, while others like maple and cherry offer a smoother look. The grain can be enhanced with stains and finishes, turning an ordinary board into a visual masterpiece. 6. Matching Grain in Projects In fine woodworking, matching grain across panels or drawers creates visual harmony. Pay attention when selecting boards, especially for tabletops or cabinet fronts, to maintain a consistent and pleasing grain flow. Conclusion Grain matters more than you might think. It influences how you cut, join, finish, and even how long your project lasts. Whether you’re building a simple shelf or a fine piece of furniture, taking time to understand wood grain will elevate both the beauty and the quality of your work. Written by TheCarpentery Team Explore more woodworking guides at TheCarpentery.com  

Understanding Wood Grain and Why It Matters Read Post »

A craftsman applies oil to a wooden plank using a brush, showcasing skilled carpentry techniques.

The Art of Wood Finishing: Stain, Seal, and Shine

Transform raw wood into a masterpiece with the right finishing techniques. 1. Why Wood Finishing Matters Wood finishing isn’t just about appearance—it’s about protection, longevity, and enhancing the natural beauty of wood. A proper finish prevents moisture damage, resists scratches, and brings out the grain patterns that make each piece unique. 2. Staining: Adding Color and Character Staining is the process of adding pigment to wood, changing its color while allowing the grain to show through. It can mimic more expensive wood types or create bold, custom looks. Types of Stains: Oil-based stains: Deeply penetrate wood and provide rich color, but require longer drying time. Water-based stains: Dry faster and are easier to clean up, ideal for indoor projects. Gel stains: Thicker and ideal for vertical surfaces or woods that blotch easily. Always test stain on a scrap piece or hidden area before applying to the entire surface. 3. Sealing: Protecting the Surface After staining (or even without it), sealing locks in the color and creates a barrier against damage. It’s an essential step in furniture, cabinetry, and flooring. Popular Sealers: Polyurethane: Durable and water-resistant. Available in gloss, semi-gloss, and satin finishes. Lacquer: Fast-drying and smooth, often used in professional shops. Shellac: Natural and easy to repair, great for antique pieces. Danish Oil or Tung Oil: Penetrating oils that enhance natural grain and add soft luster. Apply in thin, even coats with a brush, cloth, or spray. Sand lightly between coats for a silky finish. 4. Shining: The Final Touch Once sealed, polishing or buffing brings out the shine and smoothness of your finish. Depending on the desired sheen, you can choose: Paste wax: Adds a soft glow and smooth feel—perfect for fine furniture. Polishing compounds: Used after lacquer or polyurethane for a mirror-like finish. Buffing wheels or cloths: Great for speeding up the process and creating a professional look. Let the finish cure completely before polishing to avoid smudging or dulling the surface. 5. Tips for a Flawless Finish Always sand wood smooth before applying any finish. Clean off all dust with a tack cloth or vacuum. Work in a dust-free, well-ventilated area. Follow the manufacturer’s instructions for drying times and re-coating. Conclusion Wood finishing is both a science and an art. With patience, the right materials, and attention to detail, you can take a plain piece of wood and turn it into a stunning work of craftsmanship. Whether you’re staining, sealing, or shining, each step plays a vital role in achieving a beautiful and long-lasting result. Written by TheCarpentery Team Discover more finishing tips and woodworking wisdom at TheCarpentery.com  

The Art of Wood Finishing: Stain, Seal, and Shine Read Post »

wood, log, stump, tree stump, wooden, annual rings, grain, old, dry, nature, cracked, tree, wood, wood, wood, wood, wood, log, stump, stump, tree stump, tree stump, tree stump, tree

How to Choose the Right Wood for Any Project

1. Cutting: Shaping the Raw Material Cutting is the first and most fundamental step in woodworking. This is where raw wood is shaped into usable components. Using tools like hand saws, circular saws, jigsaws, and table saws, woodworkers trim, slice, and carve wood to match their design plans. Precision is key during cutting. Measurements must be accurate, and the right type of saw blade should be chosen based on the wood type and thickness. Safety gear—like goggles and gloves—is essential to avoid injuries. 2. Joining: Assembling the Pieces Once the pieces are cut, the next step is to join them together. This step brings the project to life, whether it’s a simple box or a complex cabinet. There are several joining techniques, including: Butt joints – Simple and quick, often reinforced with screws or nails. Dovetail joints – Strong and decorative, commonly used in drawer construction. Mortise and tenon – Traditional and durable, ideal for tables and chairs. Biscuit and dowel joints – Modern methods using wood inserts for hidden strength. Glue, screws, nails, or clamps are used to hold the joints together firmly. Ensuring a square and level assembly is vital for a professional finish. 3. Finishing: Bringing Out the Beauty Finishing is the final step in the woodworking process. It enhances the appearance of the project and protects the wood from moisture, wear, and damage. The finishing process usually involves sanding, staining, sealing, and polishing. Sanding smooths the surface and removes any imperfections. Staining adds color and brings out the wood grain. Sealers and topcoats like varnish or polyurethane provide a durable protective layer. Each finish gives a different effect, and choosing the right one depends on the project’s purpose, the wood type, and the desired aesthetic. Conclusion Woodworking may seem complex at first, but breaking it down into the core steps—cutting, joining, and finishing—makes it more manageable and enjoyable. Whether you’re building furniture, crafting décor, or tackling home improvement projects, mastering these three processes will put you on the path to woodworking success. Written by TheCarpentery TeamFor more woodworking tips, visit TheCarpentery.com  

How to Choose the Right Wood for Any Project Read Post »

A carpenter works with an electric router on wood indoors, showcasing craftsmanship.

Cut, Join, Finish: The Woodworking Process Demystified

Cut, Join, Finish: The Woodworking Process Demystified Discover the three essential steps of woodworking and how to master them. 1. Cutting: Shaping the Raw Material Cutting is the first and most fundamental step in woodworking. This is where raw wood is shaped into usable components. Using tools like hand saws, circular saws, jigsaws, and table saws, woodworkers trim, slice, and carve wood to match their design plans. Precision is key during cutting. Measurements must be accurate, and the right type of saw blade should be chosen based on the wood type and thickness. Safety gear—like goggles and gloves—is essential to avoid injuries. 2. Joining: Assembling the Pieces Once the pieces are cut, the next step is to join them together. This step brings the project to life, whether it’s a simple box or a complex cabinet. There are several joining techniques, including: Butt joints – Simple and quick, often reinforced with screws or nails. Dovetail joints – Strong and decorative, commonly used in drawer construction. Mortise and tenon – Traditional and durable, ideal for tables and chairs. Biscuit and dowel joints – Modern methods using wood inserts for hidden strength. Glue, screws, nails, or clamps are used to hold the joints together firmly. Ensuring a square and level assembly is vital for a professional finish. 3. Finishing: Bringing Out the Beauty Finishing is the final step in the woodworking process. It enhances the appearance of the project and protects the wood from moisture, wear, and damage. The finishing process usually involves sanding, staining, sealing, and polishing. Sanding smooths the surface and removes any imperfections. Staining adds color and brings out the wood grain. Sealers and topcoats like varnish or polyurethane provide a durable protective layer. Each finish gives a different effect, and choosing the right one depends on the project’s purpose, the wood type, and the desired aesthetic. Conclusion Woodworking may seem complex at first, but breaking it down into the core steps—cutting, joining, and finishing—makes it more manageable and enjoyable. Whether you’re building furniture, crafting décor, or tackling home improvement projects, mastering these three processes will put you on the path to woodworking success. Written by TheCarpentery Team For more woodworking tips, visit TheCarpentery.com  

Cut, Join, Finish: The Woodworking Process Demystified Read Post »

Construction site featuring ladders and tools in a home renovation setting.

Sanding and Finishing: Final Steps That Matter

Sanding and Finishing: Final Steps That Matter In woodworking, the final impression is just as important as the first cut. Sanding and finishing may be the last steps, but they are the ones that truly define the look, feel, and durability of your piece. These final touches can elevate your work from good to great. 1. Why Sanding Matters Sanding prepares your wood surface for finishing by smoothing rough spots, removing imperfections, and opening up the grain. Benefits of Proper Sanding: Achieves a smooth, professional finish Removes tool marks, scratches, or glue spots Prepares wood for even stain or finish absorption Sanding Grit Guide: Coarse (60–80): For heavy material removal Medium (100–150): For smoothing surfaces Fine (180–220+): For final sanding before finishing Always sand with the grain, and wipe dust with a tack cloth before applying finishes. 2. The Finishing Touch Finishing enhances wood’s natural beauty and protects it from moisture, stains, and wear. Common Types of Finish: Oil (Linseed, Tung): Penetrates wood for a rich, natural look Stain: Adds color while highlighting the grain Varnish & Polyurethane: Durable topcoat for water and scratch resistance Shellac & Lacquer: Glossy, fast-drying options Paint: Best for solid color finishes or bold designs 3. How to Apply Finishes Tools: Brushes, cloths, foam pads, or sprayers depending on the finish type Steps: Test on scrap wood first Apply thin, even coats Let each coat dry fully Sand lightly between coats (220-grit) Apply 2–3 coats for best protection 4. Common Mistakes to Avoid Skipping sanding between coats Rushing the drying process Applying thick, uneven coats Not cleaning off dust before finishing Conclusion In woodworking, sanding and finishing are not just afterthoughts—they’re what make your project shine. These steps add finesse, beauty, and longevity. Invest time in them, and your craftsmanship will truly stand out.  

Sanding and Finishing: Final Steps That Matter Read Post »

Close-up of construction blueprint with tools like drill and screws on a wooden table.

Why Proper Planning Is Key in Woodworking Projects

  Why Proper Planning Is Key in Woodworking Projects In woodworking, success doesn’t begin with the first cut—it starts with a solid plan. Whether you’re building a simple shelf or crafting an intricate piece of furniture, proper planning is what separates a smooth project from a stressful one. Here’s why planning is absolutely essential in woodworking. 1. Saves Time and Effort A well-thought-out plan helps you work smarter, not harder. By mapping out the steps, measuring materials, and preparing tools in advance, you avoid backtracking and wasted hours. Tip: Sketch your project first. A simple drawing with dimensions gives you a clear visual of the final result. 2. Reduces Material Waste Wood is valuable, and mistakes can be costly. Planning helps you estimate how much wood you’ll need and allows you to cut more accurately—reducing scraps and saving money. Example: A cutting list ensures you make the most out of each board by organizing your cuts logically. 3. Improves Accuracy Precision is critical in woodworking. Poorly aligned parts or uneven measurements can ruin a project. Planning gives you the time to double-check dimensions, square up joints, and choose the right tools. Golden Rule: Measure twice, cut once. 4. Enhances Safety Planning your workflow helps maintain a safer workspace. Knowing which tools you’ll use and when reduces chances of rushing or improvising dangerously. Safety Tips: Plan tool usage sequence. Maintain clean, uncluttered work areas. Use proper personal protective equipment (PPE). 5. Brings Better Results Planning leads to a better final product. Your joints fit tighter, your surfaces align smoother, and the overall appearance is more professional. Whether you’re a hobbyist or a pro, good planning adds quality and confidence to your craft. Conclusion Woodworking is more than just skill—it’s about strategy. By dedicating time to proper planning, you set yourself up for smoother execution, fewer mistakes, and a finished product that truly reflects your craftsmanship. At TheCarpentery.com, we believe every great project starts with a plan.  

Why Proper Planning Is Key in Woodworking Projects Read Post »

brown wooden board

Wood Selection to Finishing Touch: A Complete Woodworking Guide

Wood Selection to Finishing Touch: A Detailed Guide Every woodworking masterpiece begins with choosing the right wood and ends with the perfect finish. This detailed guide walks you through every essential step of the woodworking process—from wood selection to the final finishing touch—ensuring durability, beauty, and craftsmanship in your project. 1. Choosing the Right Wood The foundation of a successful project lies in the wood you choose. Different types of wood offer different textures, colors, grains, and strengths. Types of Wood: Softwoods (Pine, Cedar, Fir): Affordable, lightweight, and easy to work with. Ideal for framing, paneling, and decorative projects. Hardwoods (Oak, Maple, Walnut, Teak): Strong, dense, and visually appealing. Best for furniture, flooring, and cabinetry. Tips for Selection: Inspect for knots, cracks, or warping. Consider wood moisture content. Match wood type with project purpose. 2. Measuring and Planning Accurate measurements and planning prevent waste and mistakes. Use a measuring tape, ruler, and square for precision. Create a cutting list and step-by-step layout. Consider expansion gaps if working with natural wood. 3. Cutting and Shaping Once planned, use appropriate tools to cut and shape the wood. Common Tools: Hand saws, jigsaws, table saws Chisels, routers, and planes Tip: Cut slightly oversize and trim for perfect fit. 4. Joining Techniques Joining brings all the components together. Choose joints based on strength, appearance, and ease of construction. Popular Methods: Butt joints, lap joints, dowel joints Mortise & tenon, biscuit joints, pocket screws Use clamps and adhesives to ensure a tight, lasting bond. 5. Sanding and Smoothing Before finishing, smooth the surfaces using sandpaper or power sanders. Steps: Start with coarse grit (80–100), then medium (120–150), and finish with fine (220+). Always sand with the grain to avoid scratches. Clean off dust with a tack cloth. 6. Finishing Touch Finishing enhances appearance and protects your work. Types of Finish: Stains – add color while showing the grain. Oils – like linseed or tung oil, provide natural protection. Varnish & Polyurethane – long-lasting surface protection. Paint – for colorful and opaque looks. Apply in Thin Coats: Use a brush, cloth, or sprayer. Let each coat dry completely before applying the next. Sand lightly between coats for smoothness. Conclusion From selecting the perfect wood to applying the final finish, woodworking is a step-by-step craft rooted in patience, precision, and creativity. Master each phase and watch your projects come to life with lasting quality and beauty.  

Wood Selection to Finishing Touch: A Complete Woodworking Guide Read Post »

A focused craftsman intricately chiseling wood at a workbench, showcasing traditional woodworking skills.

Cutting, Joining, Finishing: Woodworking Processes Demystified

Cutting, Joining, Finishing: The Core of Woodworking Woodworking is an art that turns raw timber into functional and beautiful creations. Whether you’re a beginner or an experienced carpenter, mastering the three fundamental stages—cutting, joining, and finishing—is essential to bring your vision to life. 1. Cutting: Shaping the Foundation Cutting is the first step in any woodworking project. It’s where the transformation begins. Using tools like saws (hand saws, circular saws, jigsaws, or table saws), the wood is cut into precise shapes and sizes. Key Cutting Tips: Always measure twice, cut once. Choose the right saw for the job. Keep your blades sharp for clean edges. Use clamps and guides for better accuracy. 2. Joining: Building Strong Structures Joining is how individual pieces of wood come together to form a sturdy structure. There are various methods depending on the project’s purpose and strength requirements. Common Wood Joinery Techniques: Butt Joint – Simple and fast, ideal for framing. Dado and Rabbet – Stronger joints used in cabinetry. Mortise and Tenon – Classic and durable, perfect for furniture. Dovetail – Aesthetic and strong, often used in drawers. Using wood glue, screws, nails, or dowels enhances the bond between parts. Always ensure joints are aligned and tight for long-lasting builds. 3. Finishing: Enhancing Beauty and Protection Finishing gives wood its final appearance and protects it from damage. After sanding the surface to a smooth texture, finishes like stains, oils, varnishes, or paints are applied. Steps in Finishing: Sand the surface gradually using fine-grit sandpaper. Clean the dust before applying any finish. Apply a primer or conditioner for even absorption. Use multiple thin coats rather than one thick coat. Allow drying time between coats. Final Thoughts Understanding and perfecting these three steps—cutting, joining, and finishing—can elevate your woodworking projects from basic to professional. At TheCarpentery.com, we’re here to guide you through each step of the journey with tips, tutorials, and tools to help you build with confidence.  

Cutting, Joining, Finishing: Woodworking Processes Demystified Read Post »

brown tree log

How to Prepare Wood for Any Project

How to Prepare Wood for Any Project Proper wood preparation is key to any successful woodworking project. Whether you’re building furniture, crafting decor, or working on home improvements, taking the time to get your wood ready ensures a cleaner, smoother, and more durable result. Here’s a step-by-step guide to preparing wood for any type of project. 1. Choose the Right Wood Start by selecting the appropriate type of wood for your project. Consider factors like strength, grain pattern, and how easy it is to work with. For outdoor use, hardwoods like teak or cedar are best. For indoor furniture, pine, oak, or maple are great choices. 2. Inspect and Store Properly Check the wood for warping, splits, or moisture. Avoid boards with large cracks or visible defects unless they fit your design. Store lumber flat in a dry place, raised from the floor to prevent moisture absorption. 3. Measure and Mark Accurately Use a tape measure and a carpenter’s square to take accurate measurements. Mark your cuts clearly with a pencil. Precision here will save time and materials during the cutting phase. 4. Cut the Wood to Size Use the appropriate saw for your project—table saws for long straight cuts, miter saws for angles, and jigsaws for curves. Always follow safety precautions and double-check your marks before cutting. 5. Surface Preparation Sand all surfaces to smooth out rough spots and open up the wood grain. Start with coarse-grit sandpaper and gradually move to finer grits for a clean finish. Wipe away dust with a tack cloth between sanding stages. 6. Treat or Seal the Wood If your wood will be exposed to moisture or used outdoors, consider sealing it. Apply a wood conditioner, primer, or sealer depending on your finish. This protects the wood and helps the final stain or paint adhere evenly. Conclusion Taking time to properly prepare your wood will make the rest of your project easier and more professional-looking. From choosing the right material to cutting and sanding, each step plays a role in your project’s final success.  

How to Prepare Wood for Any Project Read Post »

person holding black hand tool

Craft to Creation: Exploring the Timeless Art of Woodworking

Craft to Creation: The Art of Woodworking Woodworking is more than just a trade — it’s a creative journey from raw material to a finished masterpiece. The Beauty of Woodworking Woodworking blends craftsmanship, creativity, and patience into one timeless skill. Whether it’s a simple stool or a detailed cabinet, every wooden item carries the essence of its maker. From ancient times to the modern day, woodworking has evolved, but its core remains rooted in tradition and technique. Choosing the Right Wood Every great piece starts with choosing the right type of wood. Hardwoods like oak, teak, and maple are known for their strength and beauty, while softwoods like pine are ideal for beginners. Understanding grain patterns, texture, and wood behavior helps in selecting the perfect piece for any project. Tools of the Trade Woodworking tools range from simple hand tools to advanced power machines. Beginners should start with essentials like a hammer, handsaw, chisels, measuring tape, and sandpaper. As you gain experience, tools like routers, planers, and table saws can elevate your work to the next level. Planning and Design A successful project begins with a clear plan. Sketch your idea, take accurate measurements, and decide on joinery techniques. Planning not only improves efficiency but also helps minimize waste and errors. The Creative Process Shaping and assembling wood is where the magic happens. Whether carving, joining, or sanding, each step adds personality and precision. Creativity plays a huge role — from choosing finishes to adding small design details that bring a project to life. Finishing Touches Sanding, polishing, and applying protective coats give wood a finished look and extend its life. Depending on the project, you can use varnish, stain, oil, or paint to enhance both aesthetics and durability. The Joy of Creation There’s a deep satisfaction in creating something with your hands. Each finished product is not just functional, but a work of art that reflects effort, learning, and passion. That’s what makes woodworking so rewarding — it’s a craft where heart meets hands. Conclusion From raw timber to a finished creation, woodworking is a fulfilling and artistic journey. Whether you’re a hobbyist or aspiring professional, this craft offers endless opportunities to grow, express, and create. Embrace the art of woodworking — where every project starts with a spark and ends with pride. Explore more guides and inspiration at TheCarpentery.com.  

Craft to Creation: Exploring the Timeless Art of Woodworking Read Post »

Scroll to Top