a man working on a piece of wood

Essential Woodworking Steps for Beginners: A Complete Getting Started Guide

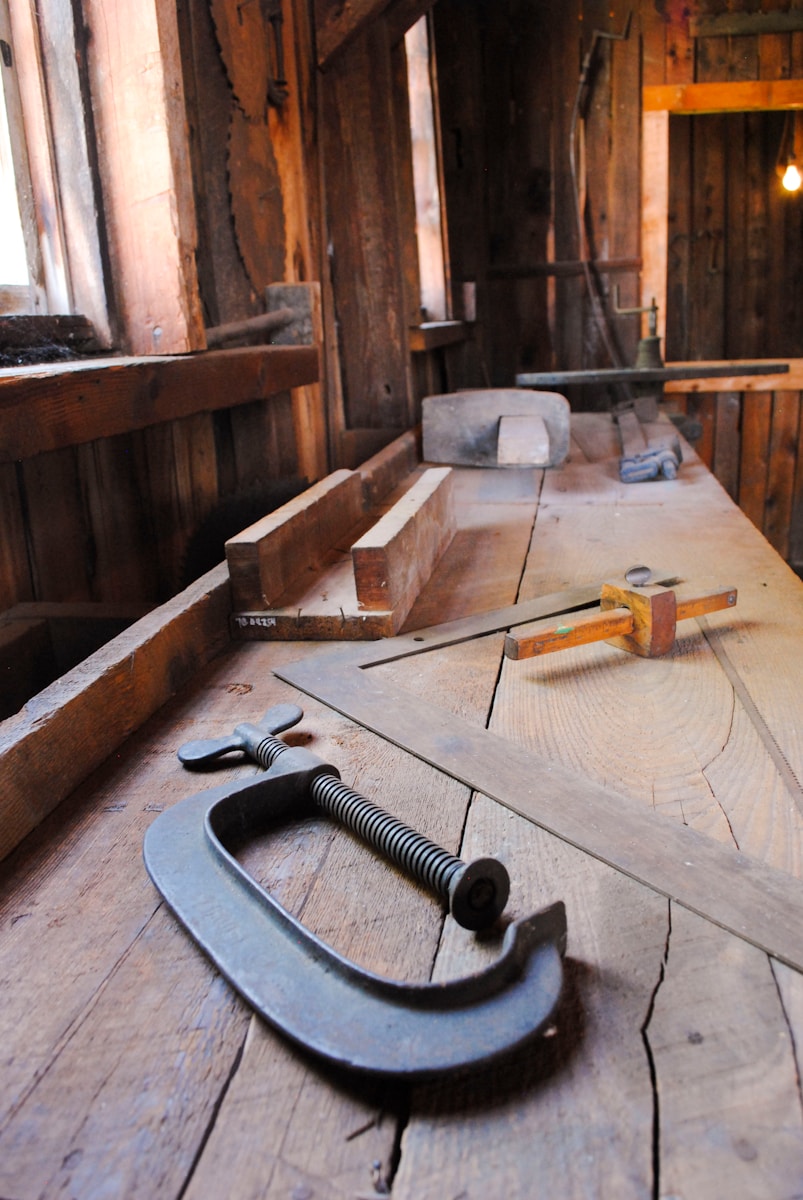
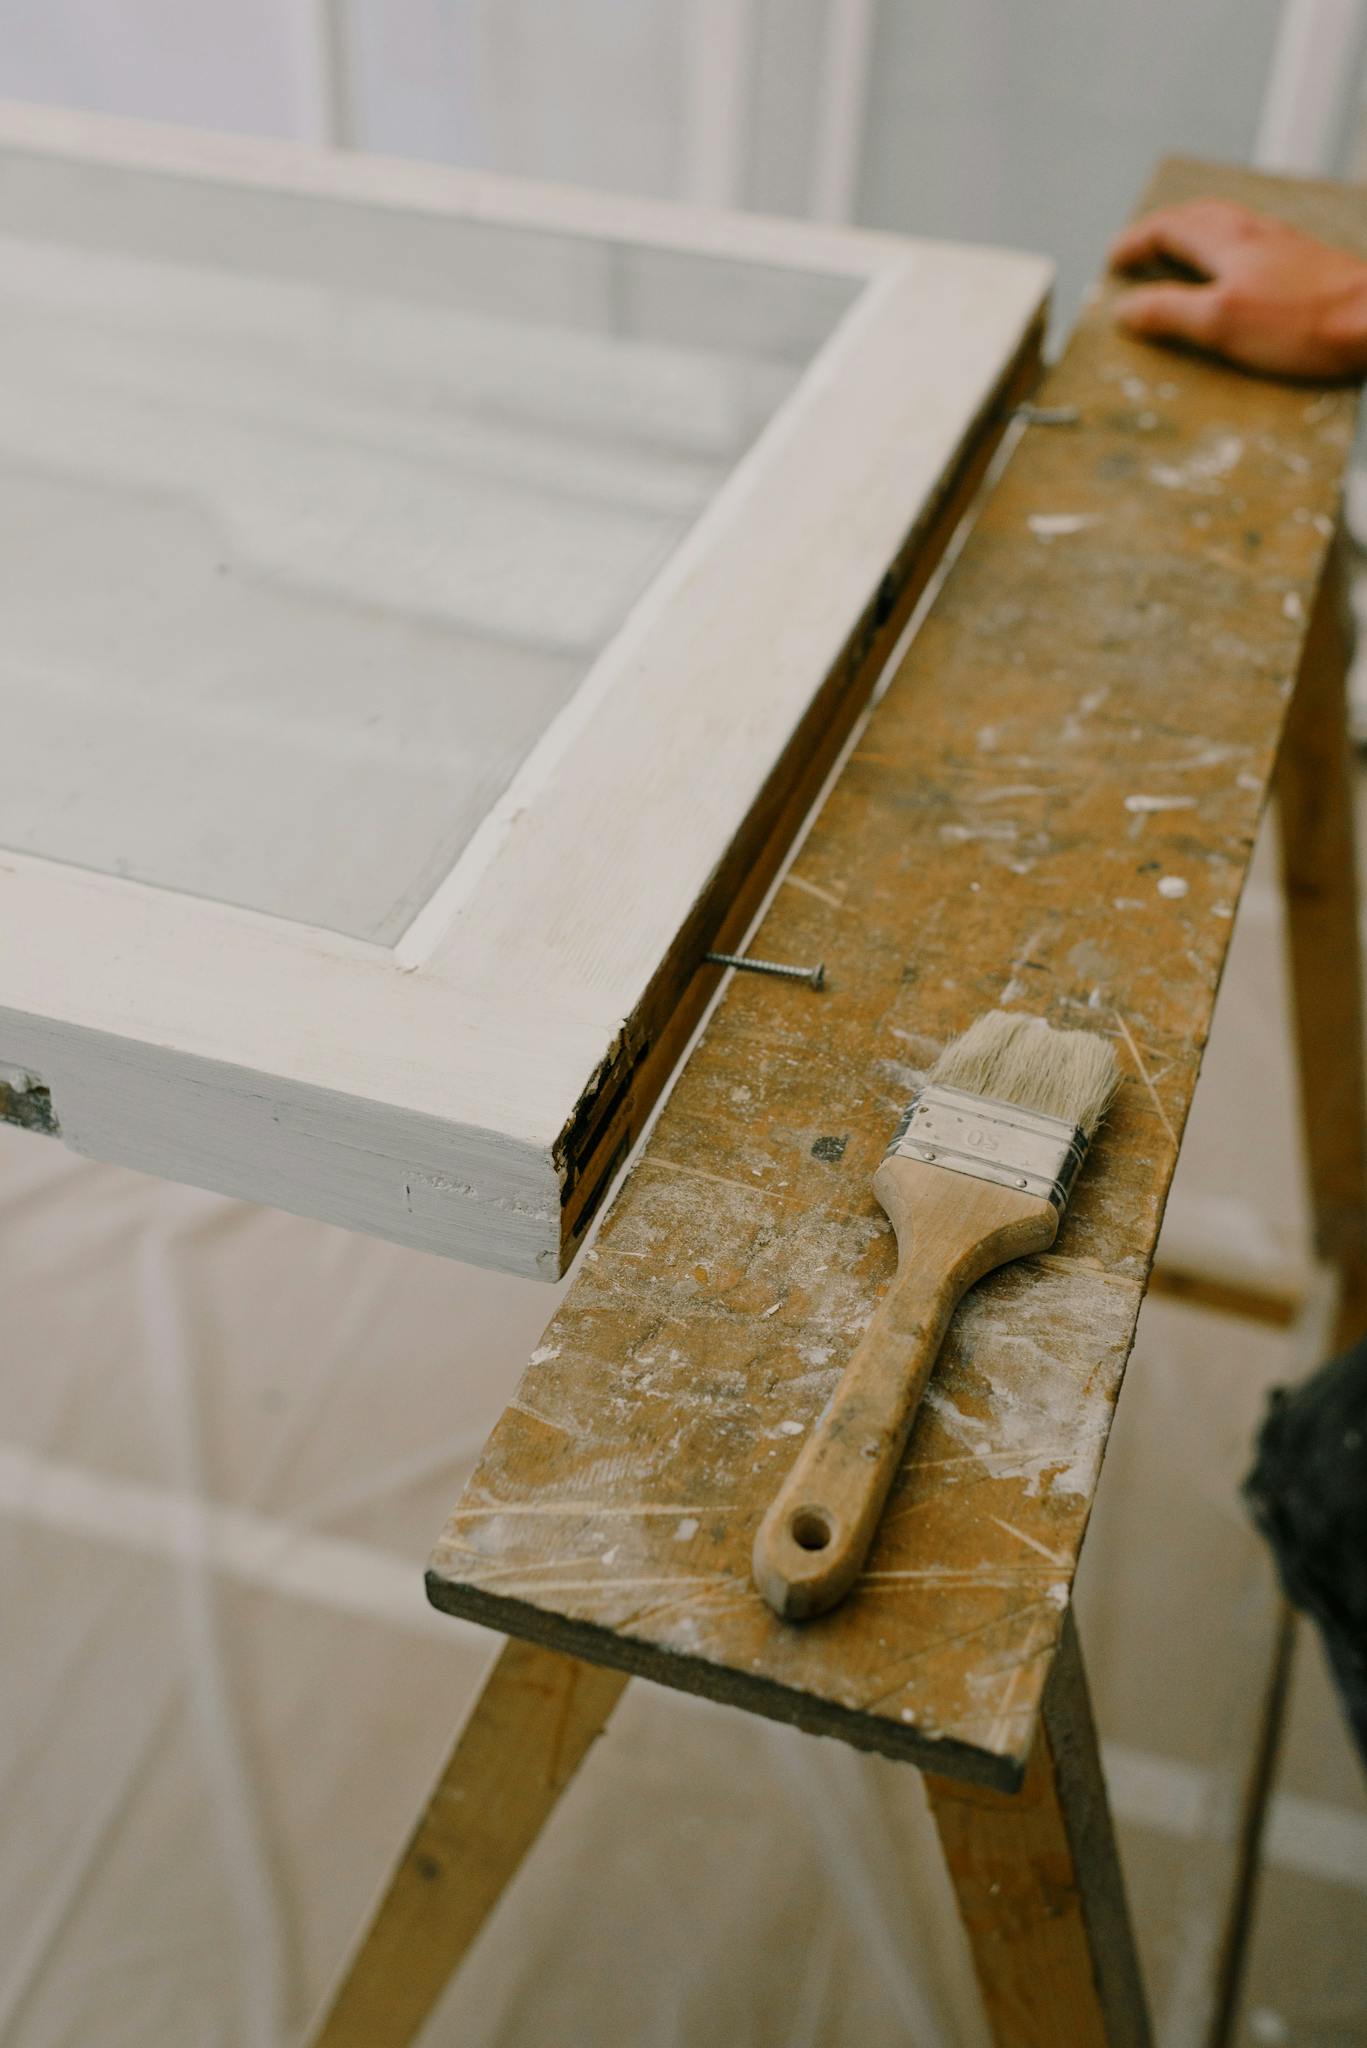
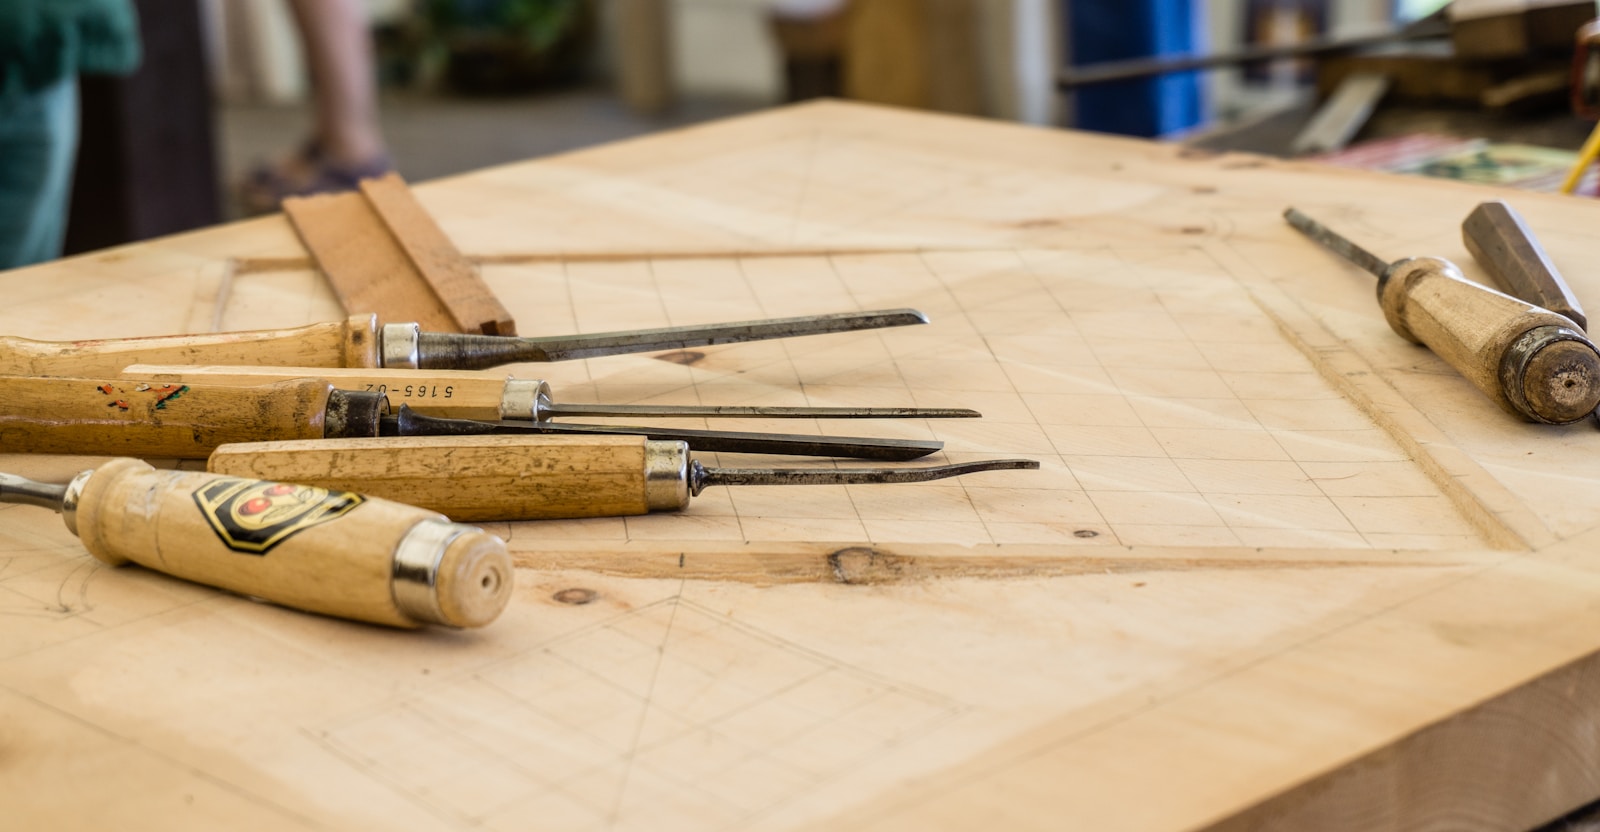
Essential Woodworking Steps for Beginners Kickstart your woodworking journey with these simple and effective steps every beginner should follow. 1. Gather the Basic Tools Every woodworker needs the right tools to begin. Start with a hammer, screwdriver set, hand saw, measuring tape, clamps, and sandpaper. As you progress, consider adding power tools like a drill, jigsaw, or circular saw. 2. Choose the Right Wood Select the wood according to your project. Popular choices include teak, pine, plywood, and sheesham. Pay attention to the wood’s moisture level, grain, and durability. 3. Plan and Measure Accurately Before cutting any wood, create a design or sketch of your project. Proper measurement and planning save time, effort, and materials. 4. Learn Cutting and Shaping Use tools like hand saws or jigsaws to cut wood to the desired shape. Always work with precision and keep your hands safe. 5. Understand Joinery Techniques Wood joinery is the heart of woodworking. Beginners can start with simple joints using screws, dowels, or brackets. As you grow, try advanced joints like mortise & tenon or dovetail. 6. Sand and Finish Your Work After assembling, sand the surfaces for a smooth finish. Apply varnish, polish, or paint depending on your desired look and durability. 7. Prioritize Safety Always wear protective gear like gloves, goggles, and a dust mask. Learn the correct use of tools to avoid accidents. Conclusion Woodworking is a rewarding skill that improves with practice. These steps will help you build confidence and start creating quality wood projects safely and efficiently. Explore more beginner guides and project ideas at TheCarpentery.com.  

Essential Woodworking Steps for Beginners: A Complete Getting Started Guide Read Post »

a close up view of a wooden fence

Planning to Finishing: A Carpenter’s Workflow Explained

Planning to Finishing: A Carpenter’s Workflow Explained Carpentry is more than just hammering nails and cutting wood. It’s a blend of creativity, precision, and structured planning. Every professional carpenter follows a well-organized workflow that ensures each project is completed efficiently, safely, and to the highest standard. From the initial idea to the final polish, here’s a step-by-step look at a carpenter’s workflow. 1. Project Planning and Design Every successful carpentry project begins with a clear plan. The carpenter meets with the client to understand the vision, requirements, budget, and timeline. Whether it’s building custom furniture, renovating a kitchen, or framing a house, detailed discussions help shape the project’s scope. Next comes the design phase, where sketches or blueprints are created. Modern carpenters often use CAD (Computer-Aided Design) software to develop accurate plans. Material selection is also finalized during this stage. Choosing the right type of wood, fasteners, and finishes is essential for both durability and aesthetics. 2. Material Preparation and Tools Check Before any cutting or building begins, the carpenter sources materials based on the finalized design. High-quality lumber and supplies are inspected for defects to ensure a clean build. Alongside this, tools and machinery are checked for functionality and safety. A well-prepared workshop, complete with saws, drills, clamps, and sanders, sets the foundation for smooth execution. 3. Measuring and Cutting The golden rule in carpentry is “measure twice, cut once.” Precision is critical. Accurate measurements prevent material waste and ensure components fit perfectly. Using measuring tapes, squares, and marking tools, each piece of wood is marked and then cut according to the design. This stage requires a steady hand, a sharp eye, and a deep understanding of the wood’s grain and behavior. 4. Assembly and Joinery Once all components are cut, the carpenter moves on to assembling the pieces. Depending on the project, this might involve complex joinery techniques like dovetails, mortise and tenon, or simpler methods like screws and nails. Glues and clamps are often used to strengthen the joints. Patience is key here—rushing can compromise the integrity of the build. 5. Sanding and Surface Preparation Before applying any finish, the wood must be smoothed. Sanding removes rough edges, tool marks, and imperfections. Starting with coarse grit and progressing to finer grits, the carpenter works to create a silky surface. This step is essential for both the look and feel of the final product. 6. Finishing Touches The final stage is applying the chosen finish—whether it’s stain, paint, varnish, or oil. This not only enhances the wood’s natural beauty but also protects it from wear and moisture. Multiple coats may be applied, with light sanding in between for a flawless result. Conclusion A carpenter’s workflow is a testament to craftsmanship and discipline. Each stage—from planning to finishing—plays a vital role in creating functional and beautiful pieces. For seasoned professionals and DIY enthusiasts alike, understanding this process is key to producing quality work that stands the test of time. Let me know if you’d like a version tailored for a blog or your website thecarpentery.com!

Planning to Finishing: A Carpenter’s Workflow Explained Read Post »

A focused craftsman honing his skills in a dimly lit workshop with tools.

Mastering the Craft: A Look Into the Woodworking Process

Mastering the Craft: A Look Into the Woodworking Process Woodworking is a timeless craft that blends art and engineering. Each project is a journey—from selecting materials to applying the final finish. Understanding each step in the woodworking process helps you build confidently and create lasting work. 1. Choosing the Right Wood Wood selection is the foundation of every project. Hardwoods like oak, walnut, and cherry are prized for their strength and appearance, while softwoods like pine are cost-effective and easy to work with. Consider grain, moisture, and intended use when choosing your material. 2. Project Planning Sketching designs, making measurements, and creating a material list are critical steps before cutting begins. A well-planned project ensures efficient use of materials and prevents costly errors. 3. Measuring and Marking Precision is key to clean cuts and strong joints. Use rulers, measuring tapes, combination squares, and marking tools to accurately lay out each component before cutting. 4. Cutting the Wood Cutting brings your design to life. Common cutting methods include: Crosscutting: for cutting wood to length. Ripping: for resizing width. Curved cuts: for artistic or custom shapes using jigsaws or band saws. Accuracy and tool safety are essential throughout this process. 5. Shaping and Joinery Shaping gives your project its unique form. Planers, routers, and chisels are used to refine edges and profiles. Joinery connects components together, using methods like: Dowels Mortise and tenon Dovetails Pocket holes The right joint enhances both strength and aesthetics. 6. Assembly Once pieces are shaped and joints prepared, they are assembled. Wood glue, screws, and nails hold the project together. Clamps are used to ensure proper alignment and pressure while the glue sets. 7. Sanding Smooth surfaces are essential for a professional look. Sand progressively with finer grits to remove tool marks and prepare for finishing. Clean off all dust before applying any finish. 8. Finishing Touches A good finish protects the wood and highlights its natural beauty. Options include: Stain to add color Oil for a natural feel Varnish or polyurethane for protection and shine Apply with brushes or cloths, and allow proper drying between coats. Conclusion Woodworking is more than building—it’s about mastering every detail. By understanding and refining each process, you elevate your skill and transform raw wood into something meaningful and enduring. With patience and practice, every project becomes a reflection of true craftsmanship.

Mastering the Craft: A Look Into the Woodworking Process Read Post »

man in black jacket sitting on chair

Woodworking Processes Every Carpenter Should Know

Woodworking Processes Every Carpenter Should Know Woodworking is the backbone of carpentry, combining age-old techniques with modern tools to create everything from furniture to fine detailing. Whether you’re a new carpenter or looking to refine your skills, understanding these essential processes is key to mastering the craft. 1. Material Selection The process begins with choosing the right wood. Hardwoods like oak and maple offer durability and beauty, while softwoods like pine are easier to work with for basic projects. Grain pattern, moisture content, and wood grade all play a role in selection. 2. Design and Planning Before cutting into any wood, it’s important to sketch out plans, determine measurements, and create a cut list. Planning saves time, reduces waste, and ensures accuracy throughout the build. 3. Measuring and Marking Precision is critical. Use measuring tapes, squares, and marking tools to layout each piece. Marking the wood correctly ensures all parts fit together as intended. 4. Cutting Techniques Different projects require different cuts: Crosscutting: slicing wood across the grain. Ripping: cutting along the grain. Angled cuts: used for joints and decorative pieces. Tools like table saws, miter saws, and hand saws are essential. 5. Joinery Joinery is the art of connecting pieces of wood. Techniques include: Mortise and tenon: traditional and strong. Dovetail joints: great for drawers. Pocket holes and biscuits: faster and effective for many builds. Each method has its place depending on the strength and appearance needed. 6. Assembly and Clamping Once pieces are cut and joints prepared, they’re assembled using glue, screws, or nails. Clamping holds everything tightly while the glue sets, ensuring structural integrity. 7. Sanding and Surface Prep Smooth surfaces are vital for a professional finish. Start with coarse sandpaper and gradually move to finer grits. Remove dust thoroughly before finishing. 8. Finishing Techniques A good finish protects wood and enhances its look. Popular finishes include: Oil finishes for a natural feel. Stains to add rich color. Polyurethane for a glossy, durable coat. Apply evenly and allow adequate drying time between coats. 9. Maintenance and Repair Skilled carpenters know how to maintain their work. This includes fixing joints, refinishing surfaces, and replacing worn parts when needed. Conclusion From start to finish, woodworking involves thoughtful steps and practiced skills. By mastering these essential processes, every carpenter can build projects that are not only functional but also showcase craftsmanship and pride.

Woodworking Processes Every Carpenter Should Know Read Post »

black and yellow hand tool

The Beginner’s Guide to Woodworking Techniques

The Beginner’s Guide to Woodworking Techniques Woodworking is a hands-on craft that blends imagination with skill. If you’re new to it, learning a few core techniques will help you get started with confidence. This guide walks you through the essential woodworking practices that every beginner should become familiar with. 1. Accurate Measuring and Marking Precision is a crucial part of woodworking. Using tools like measuring tapes, carpenter’s squares, and marking pencils helps ensure your cuts and joints fit perfectly. Always verify your measurements to avoid wasting materials. 2. Cutting Techniques Being able to cut wood properly is a foundational ability. New woodworkers should practice with different tools: Hand saws for straightforward manual cuts. Jigsaws for patterns and curves. Circular saws for making fast, straight cuts in larger panels. 3. Drilling Basics Drilling clean holes is necessary for fasteners and joinery. Use a power drill or a drill press with the right bit for your task. It’s a good idea to test on spare wood pieces first. 4. Surface Preparation with Sanding Sanding makes surfaces smooth and ready for finish. Start with rough-grit sandpaper (like 80-grit) and work up to finer grits (such as 220-grit) for a polished surface. Tools like sanding blocks or electric sanders help achieve consistent results. 5. Wood Joining Methods Attaching wood pieces securely is key to building stable structures. Beginners can explore: Butt joints: the simplest form where two pieces meet. Pocket hole joints: strengthened with angled screws. Dowels and biscuits: provide stronger, aligned joints. 6. Gluing and Clamping Wood glue enhances joint strength when applied properly. After applying glue, use clamps to hold parts in place until dry. Wipe off any squeeze-out glue for a clean look. 7. Applying a Finish Finishing protects your project and enhances the wood’s look. Common options include: Wood stains for rich color. Varnishes and polyurethane for protection and shine. Paints for bold visual appeal. 8. Staying Safe Always prioritize safety by wearing goggles, ear protection, and a dust mask. Maintain a tidy workspace and take your time to avoid accidents. Conclusion Although woodworking may feel intimidating at first, mastering these basic techniques opens the door to endless creative possibilities. With patience and practice, you can turn raw wood into functional and decorative pieces you can be proud of.

The Beginner’s Guide to Woodworking Techniques Read Post »

From above of anonymous craftsman standing near wooden workbench with brush and window with white frame in room during repair works

How Wood Becomes Art: Inside the Woodworking Process

How Wood Becomes Art: Inside the Woodworking Process Woodworking is more than just a trade—it’s an art form that transforms raw, natural materials into beautiful, functional, and lasting creations. Each piece of wood carries its own character, and through skillful craftsmanship, it is shaped into something meaningful. Here’s a look inside the woodworking process that turns simple wood into artistic masterpieces. 1. Selecting the Right Wood The journey begins with choosing the right type of wood. Hardwoods like oak, maple, and walnut are popular for furniture and fine woodworking due to their strength and appearance. Softwoods such as pine are often used for simpler structures. Each wood type has unique grain patterns, color tones, and workability. 2. Planning and Designing Before any cuts are made, there’s a careful planning phase. Woodworkers sketch designs, take measurements, and consider the final purpose of the piece. This step blends creativity with precision, laying the foundation for the final artwork. 3. Cutting and Shaping Using tools such as saws, chisels, and routers, the wood is cut into desired shapes. This stage requires both accuracy and experience to ensure clean edges and well-balanced parts. Each cut brings the design closer to reality. 4. Joining the Pieces Wooden components are joined using techniques like dovetail joints, mortise and tenon, or dowels. This step not only gives the piece strength but also adds to its visual appeal. A good joint is a sign of expert craftsmanship. 5. Sanding and Smoothing After assembly, the entire piece is carefully sanded to smooth the surfaces and remove any imperfections. This step is crucial in preparing the wood for finishing, and it also brings out the natural beauty of the grain. 6. Finishing Touches Wood is treated with stains, oils, varnishes, or paints to protect it and enhance its look. Finishing can deepen the color, add shine, and make the grain pop. It’s the final step where the wood truly becomes art. ConclusionFrom a rough plank to a polished masterpiece, woodworking is a journey of transformation. It takes patience, skill, and a deep appreciation for the material. Whether it’s a simple stool or an ornate cabinet, every piece tells a story—crafted not just with hands, but with heart.

How Wood Becomes Art: Inside the Woodworking Process Read Post »

hand tools on top of table

Understanding the Basics of Woodworking Workflow

Understanding the Basics of Woodworking Workflow Woodworking involves more than simply cutting and assembling wood. It’s a step-by-step process that follows a structured approach to turn raw materials into functional and beautiful items. For beginners, understanding this workflow is essential for producing quality results while minimizing mistakes. Here’s a breakdown of the key stages in a basic woodworking workflow. 1. Project Planning and DesignStart with a clear concept of what you want to build. Create a sketch or select a pre-made plan. Consider measurements, the type of wood, joinery methods, and finishing touches. Detailed planning helps ensure a smoother building experience. 2. Selecting Wood MaterialsChoose the appropriate wood based on your project’s needs. Look for boards that are straight, properly dried, and free from excessive defects like deep knots or cracks. Consider the wood’s texture, strength, and color. 3. Measuring and LayoutAccurately measure each piece needed and mark your cuts clearly. Tools like a measuring tape, square, and pencil are essential for this stage. Precision here prevents errors later. 4. Cutting ComponentsUse the appropriate saws—such as a handsaw, jigsaw, or table saw—to cut pieces to the specified size. Always prioritize safety and double-check measurements before making cuts. 5. Preparing the SurfacesSmooth the wood surfaces using a planer or sandpaper. This makes the parts easier to work with and helps improve the look and quality of the final finish. 6. Joining the PiecesAssemble the wood parts using a suitable joining method—like dowels, biscuits, glue, or screws. The choice depends on the design and strength requirements of your project. 7. Test Fit and AssemblyBefore permanent assembly, perform a dry fit to make sure everything aligns properly. Make adjustments as necessary. Once satisfied, proceed with the final gluing and fastening. 8. Final SmoothingAfter assembly, do a complete sanding of the entire piece. This step helps eliminate sharp edges and prepares the wood for finishing products. 9. Applying a FinishProtect and enhance the wood’s look by applying a finish such as stain, oil, or lacquer. Apply evenly with a brush or cloth and allow sufficient time for each coat to dry. 10. Quality Check and Clean-UpInspect the completed project for any rough areas or imperfections. Perform any final touch-ups and clean your tools and workspace to maintain efficiency for future projects. ConclusionMastering the woodworking workflow gives beginners a strong foundation for creating durable and attractive pieces. By following each step methodically, you can build your skills and confidence while enjoying the art of woodworking.

Understanding the Basics of Woodworking Workflow Read Post »

Crop joiner shaping hardwood plank with jack plane working at table in modern workshop

Step-by-Step Guide to the Woodworking Process

Step-by-Step Guide to the Woodworking Process Woodworking is a craft that transforms raw lumber into useful and beautiful items. Whether you’re building a simple shelf or a detailed piece of furniture, following a clear and organized process ensures better results. Here’s a step-by-step guide to help you understand the complete woodworking workflow. 1. Planning Your Project Every successful woodworking project begins with a solid plan. Define your goal, create or find a design, and gather all the necessary measurements. Decide what type of wood suits your project best and make a list of tools and materials needed. 2. Choosing and Buying Lumber Select the appropriate type of wood based on strength, appearance, and budget. Make sure the boards are straight, free of cracks or excessive knots, and properly dried to avoid issues during construction. 3. Measuring and Marking Use precise measuring tools such as a tape measure, ruler, or square to mark out cuts and dimensions. Accuracy at this stage prevents mistakes and material waste later on. 4. Cutting the Wood Using hand saws or power saws, cut the wood according to your measurements. Be sure to follow safety procedures and double-check each cut before proceeding. 5. Shaping and Smoothing After cutting, shape your pieces as needed using chisels, planes, or routers. Then, sand the surfaces to remove rough edges, splinters, and imperfections. 6. Assembling the Pieces Join the wood components using appropriate joinery techniques—such as screws, nails, glue, or traditional wood joints. Clamping the pieces during drying ensures strong, even bonds. 7. Final Sanding Once the structure is assembled, perform a final sanding to ensure a smooth and consistent finish across the entire piece. 8. Applying the Finish Protect and enhance the wood with finishes such as stains, oils, varnishes, or paint. Apply evenly with a brush or cloth, and allow proper drying time between coats. 9. Inspecting and Touching Up Check the completed piece for any flaws, rough spots, or missed details. Touch up as needed to ensure a clean and polished final product. 10. Enjoying Your Work Your project is complete! Whether it’s for personal use, a gift, or for sale, take pride in the craftsmanship and care you put into your woodworking journey. Conclusion Woodworking is a rewarding process when approached with patience and precision. By following these clear steps, even beginners can create high-quality wooden items that last for years.    

Step-by-Step Guide to the Woodworking Process Read Post »

A collection of rustic wooden kitchen utensils on a wooden table, showcasing simplicity and natural elegance.

From Tree to Table: The Complete Woodworking Journey

From Tree to Table: The Complete Woodworking Journey Woodworking is a timeless craft that transforms nature into everyday essentials. The journey from a standing tree to a finished table involves a sequence of thoughtful steps, each blending skill, care, and creativity. This guide explores each stage of this transformation—offering insight into the complete woodworking process. 1. Harvesting Raw Timber The process starts in managed forests, where trees are selected based on their type, condition, and age. After being carefully felled, the logs are transported to a sawmill, where they’re prepared for the next phase. 2. Cutting and Drying At the sawmill, logs are sawn into boards of specific thicknesses. These boards must be dried to eliminate excess moisture—using air-drying or kilns—to ensure stability and reduce the risk of future cracking or warping. 3. Choosing the Right Wood After drying, boards are graded and chosen based on their grain, strength, color, and suitability for the intended project. Woodworkers match the wood’s characteristics with the desired look and function of their piece. 4. Wood Preparation Selected lumber is then planed and squared. It is cut to the required dimensions with accuracy, ensuring all pieces are uniform and ready for joinery. Proper preparation sets the foundation for precise assembly. 5. Assembling the Pieces Joinery techniques such as mortise and tenon, dowels, or biscuit joints are used to connect the wood pieces. These methods not only provide strength but also add character and craftsmanship to the finished product. 6. Smoothing the Surface Sanding removes rough spots and imperfections, creating a flawless surface. This step is essential before applying any finishes, as it enhances the wood’s natural beauty and texture. 7. Applying the Finish Stains, oils, or sealants are applied to protect the wood and elevate its appearance. The finishing process guards against wear, moisture, and sunlight, while also enriching the grain and color. 8. Bringing It Home The completed item—whether a table, chair, or cabinet—finds its place in a living space. What once stood as a tree now serves as a meaningful, functional piece of handcrafted art. Conclusion Turning raw timber into fine furniture is more than construction—it’s a creative journey. From forest to home, woodworking blends natural materials with human artistry, producing pieces that tell stories and endure through generations.  

From Tree to Table: The Complete Woodworking Journey Read Post »

Scroll to Top